Monday, January 30, 2012

Chicken Breast Schnitzel

Ok, I have to be up front about the fact that this is NOT necessarily a healthy dish.  This is an every once in awhile dish, maybe once a month, if that.  But dang, it is GOOD!  Fried breaded chicken...it doesn't get much tastier than that!

I developed this recipe after a vacation we took a couple of summers ago to Leavenworth, WA.  It is a very cute little town in north central Washington state.  It was redeveloped some years ago to resemble a Bavarian village, and it is just adorable!  We rented a cabin just outside the town on the river and spent several days walking through the village browsing the shops and enjoying the parks and restaurants.  One night we went out to dinner at one of the German restaurants in the heart of the village.   My kids were VERY skeptical of this, because they had never been to such a restaurant and didn't believe they would have anything they'd like.  When I described to them what a schnitzel was, they reversed their opinions and decided they could eat there after all!

A true schnitzel, as it originated in Austria, is made of a veal cutlet, pounded to nearly paper thin and then breaded and fried.  According to Wikipedia, a Weiner Schnitzel is served with a slice of lemon and a side of potato salad.  Which begs the question how the hot dog chain ended up taking the name...but I digress.  Weiner Schnitzel Art is the term when it is made with pork in Germany, which it commonly is in present day.  The restaurant we went to served pork as their main schnitzel dish, but also offered a chicken variation.  My daughter, being 9 at the time, was picky and only ate about 12 foods total (one being chicken), so this was OK with her.  My son, who was more adventurous, chose the pork.  Both dishes were wonderful and amazing, and solicited the following comment: "You HAVE to make this at home!!!"

Thankfully, this is not a complicated dish.  Boneless skinless chicken breast is sliced in half crosswise (like cutting a deck of cards), then each half pounded until it is uniformly thin.  It is then dipped in seasoned flour, then into beaten egg, and then into bread crumbs before being fried until golden and crispy.  It is deliciously moist and juicy inside, crispy and flavorful on the outside, especially when served with a wedge of fresh lemon to squeeze over it as you eat.  This has become a favorite dinner at my house, and one I only serve, as I said, very occasionally, as I am not a big fan of frying things in oil.  But this is the dish my kids beg for, the one they answer first when asked "what do you want for dinner?"

I'm posting this for Beverly, who is my daughter's friend Mikayla's grandma.  We had Mikayla to dinner a few weeks ago and I made this, and she absolutely loved it, so Bev has made it a few times at home herself.  I'm always glad to pass on a popular recipe!

Chicken Breast Schnitzel
Serves 4

Ingredients:

2 large boneless skinless chicken breast halves, trimmed of fat
2 cups flour
Couple dashes salt, pepper, and paprika
2 eggs, beaten
2.5 cups bread crumbs (I use panko- they are the crispiest)
Vegetable oil for frying
1 fresh lemon, sliced into wedges

Directions:

1.  With a very sharp knife, slice each chicken breast half crosswise (through its thickness).

2.  Place each slice of chicken between two layers of wax paper covered with a dish towel and pound with a rolling pin or meat mallet to a uniform thickness of about 1/4 nich.

3.  Mix flour, salt, pepper and paprika in a wide, shallow dish.  Beat eggs in a separate dish, and place bread crumbs in a third dish.  Line them up in the listed order, like a assembly line.

4.  Heat a couple of tbsp. vegetable oil in a large skillet over medium high heat.

5.  Dip one chicken slice into the flour mixture, coating well on both sides.  Dip into egg mixture, again coating it on both sides, then into bread crumbs.


6.  Fry chicken pieces in skillet until golden brown on each side, making sure to cook through.  When cooked, remove to a paper towel-lined plate to drain.

7. Repeat for all chicken pieces, cleaning pan and adding new oil between batches as necessary.
8.  Serve hot with lemon wedges on the side.


We usually have ours with a noodle side that is made by Rice-a-Roni, Olive Oil and Herb blend.  Years ago, I used to buy a Near East boxed noodle dish that we all loved, but they don't seem to carry it anywhere anymore.  This is the closest I have found to it, and my kids really like it.

Next time I will be back to posting healthier dishes- sometimes you just gotta have that good comfort food!  As fried dishes go, you could do a lot worse than this one.  See you next time!

Sunday, January 22, 2012

Chicken Tortilla Soup

This is the time of year for soup.  Deep into winter, I crave the warm comfort that a good soup delivers on a dark, cold winter day.  There are a lot of soups that I make, many I have worked on perfecting over the years, but this one remains not only one of the most simple, but the most delicous as well.

This recipe was inspired by Tyler Florence.  Tyler, in case you have been living in a cave for the past decade or so, is a Food Network chef/star.  I started watching him in 2000 when I was pregnant with my daughter, who is now 11.  I had some pregnancy complications, and was on bed rest for couple of weeks, and once I got tired of regular daytime televison (maybe a day and a half in), I started watching the Food Network.  Emeril, Sara Moulton, Bobby Flay, Tyler...they took me away from my troubles and made me imagine the wonderful dishes I could create in the kitchen- once I wasn't carrying the weight of several bowling balls in my abdomen, that is.  That is what got me hooked on cooking shows.  I learned so much, from cooking terms to some unusual ingredients, to knife techniques.  Tyler was my favorite.  It didn't hurt that he is all kinds of cute, and defintitely has a way with the camera!  I have enjoyed many of his shows, but my favorite remains the original Food 911, where Tyler comes to the aid of some poor unsuspecting cook with a kitchen disaster and helps them turn out an incredible dish worthy of accolades.  On this one particular show, he did chicken soup 3 different ways.  I know that one was chicken tortilla soup, one was a Thai chicken soup, and I believe that the third was a classic chicken noodle, but I'm not positive on that.  In any case, the chicken tortilla soup really grabbed me.  I had never had anything like it before, and it looked wonderful.  Tyler, though, he is a by-the-book chef, and he did everything from scratch, right down to the chicken broth.  But heck, I am a full-time working mom of 2 kids- I don't have the kind of time it takes to do that kind of thing.  So I started to think about ways I might take his recipe and modify it to use convenience ingredients, to make it easier and less time-consuming.  I think I did a pretty decent job.  I have been making this soup for several years now, and it never fails to get praise.  This was the first time I tried in in a slow cooker however.  There is some prep involved, but once that is done, it just cooks in the slow cooker and you don't have to worry about it until it is time to eat.

Ingredients:

About 4 cups cooked chicken, shredded (note: you can use rotisserie chicken, or cook your own.  I braise bone-in chicken breasts in chicken broth with some sliced onions until cooked through, cool, then remove skin and bones and shred.  I strain the broth and reserve to use for the soup.)

1 onion, sliced (see instructions)

3-4 cloves garlic, minced or pressed

1 chipotle pepper (canned in adobo sauce), chopped finely.  These come in a small can in the Mexican foods aisle of the grocery store, usually near the enchilada sauce.  I usually freeze the leftovers, and just use what I need a little at a time later.  They keep very well this way.

1 can diced tomatoes (I prefer the fire-roasted ones)

1 quart chicken broth

 Vegetable oil

4 corn tortillas, sliced (see below instructions)

Instructions:

1.  Slice onions.  This is how I do it:

Cut off the root and stem ends of the onion.

Peel skin off under cold running water (helps to prevent your eyes from tearing up.

Slice onion lengthwise into thin slices.

2.  Heat 2 tbsp. vegetable oil in a skillet until hot.  Add onions and reduce heat to medium.  Cook stirring often until onions are nicely browned and caramelized.


3.  Chop chipotle peppter into a fine mince.  Mince or press the garlic.

4.  Add garlic to onions and sautee 1 minute, being careful not to scorch garlic.  Remove from heat and dump onion mixture into slow cooker crock.

5.  Add chicken, broth, tomatoes, and chipotle pepper.  Stir to incorporate.  Cook on Low for 7 hours or High for about 4 hours.
 Note about the tomatoes: I like to puree mine with a stick blender.  You don't have to though.  If you don't want the tomato chunks without the work of pureeing them, you could use canned crushed tomatoes instead.

6.  While soup is cooking, slice up tortillas.  Stack tortillas and cut in half, then into strips
7.  Preheat oven to 375 degrees.  Put tortilla strips on a baking sheet and drizzle with 1 tbsp. vegetable oil.  Toss to coat.  Separate tortilla strips and lay side by side on baking sheet, not touching.  Bake at 375 for 10-15 minutes or until golden and crispy.  Remove from oven, toss and sprinkle with salt.  Set aside.
8.  When soup is done, ladel into bowls.  Top with tortilla strips and some shredded cheddar cheese.  Other optional toppings:  sour cream, diced avocado, chopped cilantro.


This is kind of spicy, due to the chipotle pepper.  If you don't like spicy foods, just use half a pepper or so.

This is a very warm, satisfying soup.  If you don't want the work of making your own tortilla strips, you can use bagged tortilla chips.  This will really warm you up on a long winter day.  I like to make a big batch to last for several days, though it usually only lasts a couple in my house, between my husband and my 15 year old son!

I hope you enjoyed this- I have many more soup recipes, which I hope I can share before the winter is up.  The way the weather is looking here in the Pacific Northwest, that may be a good long time, so I should be able to post at least a couple more!  Next time, though, I think I will show you a favorite chicken dish at my house, one that my kids BEG for.  Happy cooking til then!

Friday, January 20, 2012

Sweet Potato and Mushroom Casserole


I promised a side dish last time, and then I got to thinking that I hope that everyone is not tired of sweet potatoes, having just gotten through the holidays!  I am going to post it anyway, because it really is yummy.  It would be great as a side dish, or as a vegetarian main course.

This dish was inspired by a little hole-in-the-wall restaurant that used to be in downtown Salem called the Soup Cellar.  It was run by Marc, who made everything from scratch, right down to the salad dressings and sauces.  It was phenomenal food!  He operated there for several years before suffering burnout from the long hours and the high overhead cost of running a restaurant, and sold the establishment to someone else who could not hold a candle to the original, and soon went out of business.  I sure miss that place!  He had a few regular specials that he rotated on the menu, and one of them was a baked sweet potato, topped with sautéed mushrooms and onions, fresh chopped herbs, and his own yogurt-tahini sauce.  It took me awhile to work up the nerve to try it. Growing up, my experience with sweet potatoes was confined to the syrupy-sweet marshmallow-topped variety on the Thanksgiving table, which just never appealed to me.  I confessed my misgivings to Marc one day, and he assured me that I would like his sweet potato.  He was right- it was the perfect combination of sweet and savory.  I have since renounced my prejudice of sweet potatoes and have enjoyed them in a number of savory dishes, including this one, which is now a Thanksgiving staple at my house.  But the one I am sharing today, I think, has to be my favorite.

Now, I have baked sweet potatoes before and had them with the mushroom-onion sautee, and it's...fine.  It's never quite as good as Marc's was though.  One problem I have is that most of the sweet potatoes in my grocery store are way too large for a single serving.  They take a long time to bake, and then they are not practical for bringing to work for lunch because of their size.  What I wondered was if it would be possible to create a casserole dish that would incorporate these ingredients, and if it would be similar enough in flavor to the original.  I began to envision a casserole of layered thinly sliced sweet potato, baked until tender, topped with the mushroom and onion sautee.  But how to do this without drying out the sweet potato?  Perhaps a gratin?  or something along the lines of a skillet casserole, like a Pommes Anna, only with sweet potato instead of potato?  My research began.

First, I looked up sweet potato gratin recipes.  A gratin is basically a vegetable baked with a cream and/or cheese, which certainly is very flavorful, but not really what I was going for.  For one thing, I was looking to keep the fat content low for my dish, I didn't want anything saucy, and I also wanted the flavor of the sweet potatoes to be unchallenged by a sharp, tangy cheese sauce.  Next I looked at recipes for Potatoes Anna.  For this dish, thin slices of potato are layered with butter in an overlapping spiral in a skillet and cooked until the bottom slices form a crispy crust, while the slices above it cook through to become soft and tender.  Inverted onto a plate, it forms a lovely presentation, and the contrast of the crispy potato crust with the tender middle is enjoyable and delicious.  This method did solve the problem of cooking the sweet potato without the use of cream or a sauce, but again, not really what I was going for.

Still, I ran across this recipe from the New York Times for Sweet Potatoes Anna, and it looked promising.  Instead of being cooked on the stovetop in a skillet, the layered slices of sweet potato were tossed in melted butter and then layered in a round gratin dish, weighted down, and then baked at a high temperature.  Brilliant!  Tossing the sweet potato slices with melted butter keeps them from becoming dry while cooking, although it does add a lot of fat.  I thought that I could probably reduce the amount of butter and substitute with canola oil and achieve the same results.   So this recipe became the basis for my own, with some modifications, of course.  This recipe uses thyme, which reminded me of the fresh herbs that Marc used to sprinkle over the topped baked sweet potatoes, so I incorporated that into my recipe as well.
I should mention that my initial run of this dish was on quite a small scale.  Since I knew that I was the only one in my family who would eat this, I did not want to make a huge dish.  Do keep that in mind, and consider doubling or tripling the amounts to make a larger batch, as well as increasing the time in the oven.

This was a success for me- the flavor came very, very close to the memory of Marc's baked sweet potatoes.  Next time I will probably use more mushrooms and onions than I did this time.  The amount I had did cover the top of the casserole, but barely.  I think it would be better with a good inch layer of the mushroom/onion sautee.  The tahini sauce was ok, but was too thick, so I will be reworking this in the future.

Ingredients:

1 large sweet potato, peeled and sliced very thinly
2 tbsp. butter, melted
2 tbsp canola or other vegetable oil
Salt/pepper to taste
Thyme- a couple tsp fresh chopped, or couple dashes of dried
Mushrooms- about a dozen, washed and sliced.  I used regular white, but you could use a mix of different ones
1/2 of a large onion, diced
1 shallot, minced
2 cloves garlic, minced
1 tbsp canola or vegetable oil
1 tbsp butter
Salt/pepper to taste

Instructions:

1.  Preheat oven to 425 degrees.

2.  Place sweet potato slices in a large bowl and sprinkle with salt and pepper.  Add thyme, melted butter, and oil, and toss until slices are well coated and seasonings are distributed.

3.  Spray the bottom of a 9 inch round casserole, baking dish, or oven-proof skillet with cooking spray.  (I used a Pyrex deep-dish pie dish.)

4.  Place sweet potato slices around the outside of the bottom of the dish, slightly overlapping the slices to form a ring around the outer edge of the bottom of the dish.  Then make another ring just inside the first one, slightly overlapping the outer one.  Continue adding additional rings until you reach the center, so that you have one layer of sweet potato slices covering the bottom of the dish.  Repeat with a second layer on top of the first, until you have used all of the slices.


5.  Place a sheet of foil directly on top of the sweet potatoes.  Place a baking dish or skillet slightly smaller in diameter than the one the sweet potatoes are in on top of the foil, to weigh down the sweet potatoes.

6.  Place in preheated oven and bake for 15 minutes.  Check after 15 minutes.  Sweet potatoes should be tender but not mushy.  If still too firm, bake for another 5 minutes and check again.

7.  While sweet potatoes are baking, sautee mushrooms and onions.  Heat 1 tbsp canola oil over medium-high heat in a skillet.  When hot, add onions and reduce heat to medium.  Cook 5 minutes or until onions are translucent and tender, then add mushrooms, shallots and 1 tbsp. butter, mix to incorporate with onions, and distribute over the bottom of the pan.  Do not stir for at least 2 minutes.  (This is the secret to great sauteed mushrooms- leave them alone!)  After at least 2 minutes, stir a bit with a spatula and then let them be for another minute or so.  Mushrooms should brown before each stir.  Continue to cook until most of the liquid has evaporated and add garlic, thyme, salt and pepper.  Stir and cook 1 minute, then remove from heat.  Set aside.


8.  Remove weight and foil and place back into oven, uncovered, for 10 minutes.  Sweet potatoes should begin to caramelize on top.

9.  Remove mushroom mixture from skillet using a slotted spoon and spread on top of sweet potatoes, covering them completely.  Put casserole back into the oven for 8-10 minutes, until mushroom mixture begins to bubble.  Remove from oven and rest 10 minutes.

10.  Slice into wedges.  Serve with yogurt-tahini sauce (below) to drizzle on each serving.

Yogurt-Tahini Sauce

1 cup plain yogurt
2-3 tbsp tahini (taste as you go, adding more until the balance is right)
4 tbsp lemon juice
1 tbsp soy sauce

Whisk all ingredients together.  Can be served immediately, but it's better if it is made ahead.  Add more liquids (more lemon juice, or water) if necessary to thin, but be careful not to add too much soy sauce or it will be too salty.

I will be posting again soon with a favorite soup recipe.  I scored a great sale yesterday at the grocery store on bone-in chicken breast halves, and that means soup!  Check back later this weekend for that one!

Sunday, January 15, 2012

Spatchcocked Roasted Chicken

 Roasted chicken is one of the most basic comfort foods, and a favorite in my house.  It is my daughter's dinner of choice for special dinners, and my son always looks forward to them because where there's roast chicken, there's gravy, and where there's gravy, there's mashed potatoes!  This is a bit of a twist on basic roasted chicken, because prior to roasting, the chicken is spatchcocked.  Yes, spatchcocked.  What the heck is that? It's just a fancy (humorous?) term for removing the backbone to essentially butterfly the chicken.  The advantage to this method is that it takes less time to roast than leaving the chicken whole.  For my chicken, I chose to marinate it prior to roasting, but you can do a simple roast without the marinade.

Roasted Garlic-Lemon Spatchcocked Chicken

Ingredients:
 1 whole roaster/fryer chicken, about 4 pounds
Olive oil, about 1/2 cup
4-5 cloves garlic
1 lemon
3-4 sprigs fresh rosemary, removed from stems and coarsly chopped (or use a tbsp or so of dried)
Salt and pepper (or grill seasoning, which is what I used)

Instructions:

1.  Place chicken breast side down on cutting board.  With a knife, make an incision along the right side of the backbone from top to bottom.
 2.  With kitchen shears (or a knife, if you prefer), cut along the incision all the way through.  This is easiest if you can find where the ribs meet the backbone, and cut right along where they join.

3.  Repeat with the other side of the backbone to remove it completely.
  4.  Wash lemon and slice 1/8 inch thick slices.  Crush garlic cloves to remove skins.

5.  Place lemon slices and garlic in a large self-sealing bag, along with the olive oil, rosemary, and salt and pepper to taste.  From the outside of the bag, squeeze some of the lemon slices with your fingers to release the juice into the marinade.
6.  Add chicken to bag and seal.  Turn bag so that marinade evenly distributes and coats the chicken.
7.  Marinate at least one hour, but several is preferable.

8.  Place a rack in your roasting pan, or use a baking sheet with a wire rack.  Remove chicken from marinade, open chicken up and place on rack skin side up.
9.  Roast at 375 for 30 minutes.  After only 30 minutes, my chicken already looked like this:
10.  Reduce heat to 350 degrees and continue roasting, approximately another 40-50 minutes, until meat thermometer registers 170 degrees in the thigh.  Baste occasionally while roasting.

11.  Allow to rest 10 minutes before carving.


This chicken was SO moist and tender, and had great flavor from the marinade.  I marinated mine about 4 hours before roasting.  I did not make a gravy this time, as we were having rice with this rather than potatoes, but you certainly could make a gravy with the pan drippings if you wanted to.

We all like the breast meat best, so had thighs and drumsticks for leftovers.  I made a simple chicken salad for sandwiches with those leftovers, and since the meat was infused with the garlic, lemon and rosemary from the marinade, I thought that adding pesto to the chicken salad would give it something a little different.  It was very tasty!  I used about 2 parts mayonnaise and 1 part plain yogurt until I got the consistency I wanted, then added a couple teaspoons of prepared pesto.  I really liked the zing that the pesto gave it.

This makes a great Sunday dinner or celebration dinner without too much fuss.  The chicken can go into the marinade early in the day, and then just pop into the oven a couple of hours before it's time to eat.  Skin-on chicken is not the healthiest of meals, but every once in awhile doesn't hurt.  I like the fact that it takes less time to roast when it's spatchcocked like this.

That's all for now- next time I will be back with an interesting side dish that I hope you will like.

Sunday, January 8, 2012

Turkey Kefta With Tzatziki


Hello!  Thanks to all of my friends who have given me such positive feedback on this blog, especially since there's really not much on it yet!  I am happy to be able to share with you my cooking adventures, and hope you continue to enjoy my posts here.

I am still working my way through a bunch of ground turkey that I bought last weekend, and though I know that the lettuce wraps I posted last time were made with ground turkey, I'm going to bore you with yet another recipe for it.  This is the reality of most home cooks- you need to use up what you have in the fridge before it goes bad!  Ground turkey is a great staple to keep around though- it's healthy, versatile, and tasty.  My issue with it is that I tend to stick to a lot of the old standbys:  spaghetti, chili, tacos, meatloaf.  Not that there is anything wrong with any of those- I just get bored making the same old things.  I was looking to try something different this time, so went in search of ideas.

I kind of had this idea in the back of my mind of a non-traditional meatball, maybe spiced with something out of the ordinary, and with a sauce other than the all-too-common tomato-based sauce.  I asked for ideas on a forum I frequent, and was intrigued by a couple of meatball-type recipes that were suggested there.  I love Greek food, and started thinking about maybe some type of Greek meatball.  They actually have a name- keftedes, and are traditionally made with ground lamb, beef, or a combination of the two.  I had also thought about maybe using some stronger spices, such as those found in Indian or Middle Eastern cooking, which were in mind of the recipes that were suggested by my forum friends.  Google is your friend; I learned that many countries from Morocco to the Middle East to India to Greece have some form of a spiced ground meatbal, or kefta.  Often these are served with pita bread and a yogurt-based sauce.  I love Tzatziki and have had it many times at Greek restaurants, so though this was a good direction to go.  I looked at several recipes, and as seems typical for me, ended up incorporating components of each of them to create my own recipe and method of cooking.

One recipe I looked at was this one for kefta, Middle Eastern spiced meatballs: 
This seemed like a really good basic recipe.  It uses the traditional lamb and/or beef, but I didn't see any problem with substituting ground turkey.  I liked the sound of the spice mixture in this recipe, and also that it was simple and basic, a good foundation.  As far as the cooking method, it suggests that the meatballs be browned in a pan and finished in the oven.  I liked this, because browning on the stove top will give the meatballs great color and seal in the juices.  Finishing in the oven will allow them to cook through without drying them out.

Next, I found this recipe for Greek meatballs (keftedes) by Cat Cora at the Food Network website:
This recipe uses ground beef, but there were two things I liked about it.  One was that unlike the first recipe, milk-dipped bread was added to keep the texture of the meat tender.  Often when I cook with ground turkey (especially lean ground turkey), the texture can be tough and somewhat dry.  The bread will help the meat retain moisture and keep the texture soft and tender.  The other element of this recipe that appealed to me was that the meatballs are dusted with flour prior to browning on the stovetop.  This helps to seal in the juices, as well as create a crispy crust on the outside of the meatballs.

This one actually does use ground turkey for the meatballs, but what I was most interested in for this one was the author's recipe for tzatziki, which is linked in the post.  Tzatziki is pretty basic- it is a mixture of yogurt, cucumber, lemon and garlic.  This recipe added dill, which I like a lot, and mint. Since I was using mint in the meatballs, I liked the idea of repeating it here.  I used his recipe as a guide, but used my own measurements (which were not really measurements at all, just adding stuff til it looked about right.)

So, research done, I assembled my meatballs.  One recipe (I forget which) suggested mixing up the meat and spices and refrigerating it for an hour before cooking.  I took the suggestion, and while I was waiting, made my tzatziki, as it, too, should be refrigerated for awhile before serving.  I also used this time to toss together a Greek salad of cucumber, tomato, kalamata olives, onion, and feta.  I also added some garbanzo beans that were in the fridge begging to be used before they went bad.  Normally I would make my own dressing of lemon, garlic and olive oil, but used Newman's Own Olive Oil and Vinegar dressing in order to save some time.

These meatballs are moist, spicy (though not hot) and extremely flavorful.  The tzatziki is a wonderful compliment to them, cool and tangy in contrast to the smokey flavor of the meat.  When I make these again, I will probably use a bit less cumin, as it is a very strong spice and tends to overpower the other flavors.  I still really liked these meatballs, and look forward to having them for lunch this week (assuming my husband leaves any for me!)

Turkey Kefta With Tzatziki
Makes 20-25 meatballs, depending on the size you roll them (mine were about pingpong-ball size).  4-5 meatballs makes a very decent serving size.

Ingredients (not all are pictured):
1 package (1.25 pounds) lean ground turkey (93% lean)
1/2 of a medium-large onion, minced
2 slices white whole-grain bread
Couple tbsp milk
2 cloves garlic, minced (I press mine in a garlic press)
2 tsp ground cumin
1 tsp ground cinnamon
1 tsp ground allspice
Fresh mint leaves, chopped finely (I have some growing in my backyard.  I used the leaves from two sprigs.  You could use parsley instead.)
2 tbsp olive oil
Flour for dusting

Instructions:
1.  Combine turkey, onions, garlic, and spices in a large bowl.

2.  Place bread slices in a small bowl and drizzle milk over them.  Use your fingers to crumble bread and soak in the milk.  Press out any excess milk and discard.  Add moistened bread crumbs to bowl with other ingredients.

3.  Mix thoroughly with your hands.  Form into a large ball in the bowl, cover, and refrigerate for at least one hour.
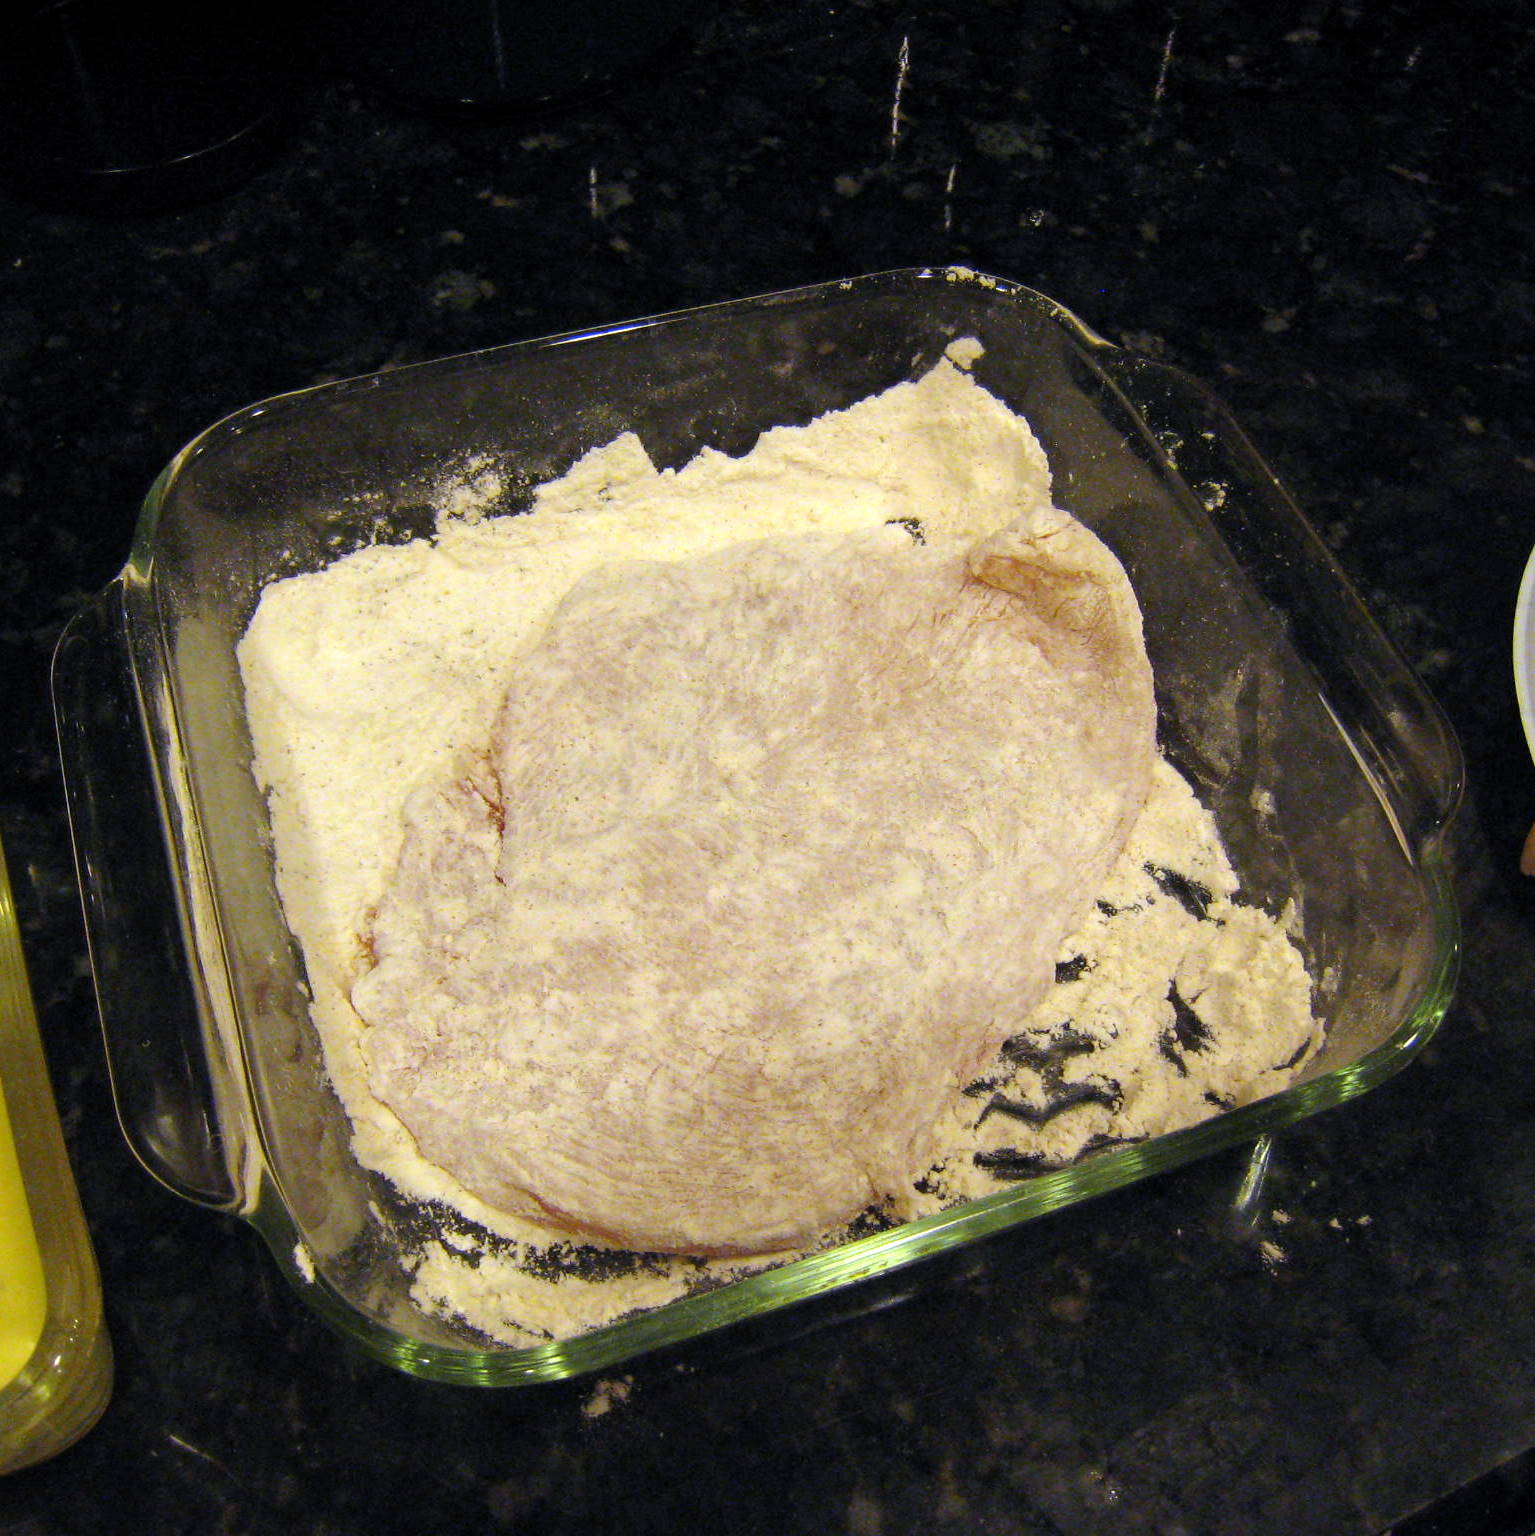
4.  Line a baking sheet with parchment or wax paper.  Spoon about 1/4 cup of flour onto a plate.  Roll 1-2 tbsp. of meat mixture to form a ball about ping-pong ball size.  Don't roll them too tightly- keeping them somewhat loose and not too compacted will keep them from becoming tough and rubbery.  Roll lightly in the flour, shaking off the excess.  Place on the lined baking sheet, and repeat until all of the meatballs have been formed.
5.  Heat 1 tbsp of olive oil in a large skillet over medim-high heat. When hot, add half of the meatballs to the pan, keeping at least an inch or two apart.  Allow to brown for a minute or two and then turn, continuing to do this until the meatballs are browned on all sides.
6.  Remove meatballs (carefully- they are delicate and may easily fall apart) from pan and place on a foil-lined baking sheet.  Add the other tbsp. olive oil to pan and brown the rest of the meatballs, then add to the prepared baking sheet.

7.  Bake in a 350 degree oven for 12-15 minutes until cooked through.  Check with a meat thermometer, or just check a meatball with a fork.
 Serve with tzatziki (recipe below).  I served mine with the above-mentioned Greek salad and a side of couscous.  These would be good in a pita with the tzatziki, but I did not have any pita bread on hand.


Tzatziki

1 cup plain Greek yogurt (Note: all I had was regular non-fat plain yogurt.  I strained it through a tea towel-lined seive over a bowl for about an hour to remove some excess water, and it worked beautifully.  Place yogurt in lined seive and cover with some plastic wrap.  Place a heavy object- I used a 28 oz. can of tomatoes- on top of the plastic wrap and put in the refrigerator.  When strained, the yogurt will scrape right off of the tea towel into a bowl.)

About 1/3 of a cucumber, peeled and grated or finely chopped

2-3 cloves garlic, finely minced or pressed

2 tsp lemon juice

1 tsp dried dill

1-2 tbsp finely minced fresh mint

Couple dashes of salt

Mix all ingredients in a bowl.  Refrigerate at least one hour before serving.

I promise that next time I will post something that does not involve ground turkey!  Actually, I am roasting a spatchcocked chicken for dinner tonight, and might post that next.  Don't know what spatchcocked is?  Stay tuned to find out!